
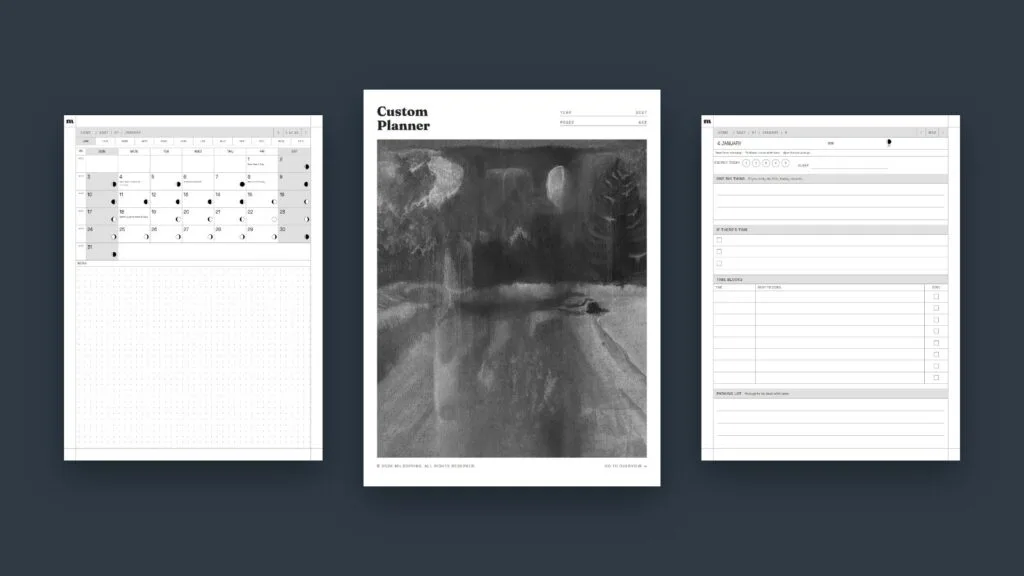
If you want to design your own planner for an e-ink tablet, the trick is to decide what you’ll actually use before you think about how it looks. Pick how long it should run, which pages you’ll open every day, and which dates should already be filled in. Then build it as a hyperlinked PDF sized for your tablet, so every month, week and day is one tap away.
We walk through those choices below in the order that makes them easiest, using the same steps as our planner builder. You can follow along on paper first if you’d rather sketch it out.
Why a planner for e-ink is different from a paper one
A paper planner works because you can flip to any page in a second. On a reMarkable, Supernote or Kindle Scribe, flipping through 400 pages one swipe at a time gets old fast. That’s why a good digital planner is a hyperlinked PDF: the year page links to each month, each month links to its weeks, and each week links to its days. You tap your way around instead of scrolling.
Two more things matter on e-ink. The page has to be the exact size of your screen, or the tablet shrinks it and your lines get cramped. And most tablets have a toolbar that sits on top of one edge of the page, so a planner made for your device leaves that edge clear.
Step 1: Decide how long it should cover
When you design your own planner, start with the time span, because everything else hangs off it. There are three ways to go:
- One year is the classic choice. It doesn’t have to start in January: a school year can start in August, a fiscal year in July, or you can start this month and run twelve months from today.
- Two years works well if you plan far ahead or just don’t want to buy a new planner next year. To keep the file light, it’s best paired with monthly and weekly pages rather than a page for every day.
- Undated means you write the dates in yourself. It’s the right pick if you plan in bursts and hate seeing blank weeks you skipped.
While you’re here, pick whether your weeks start on Sunday or Monday. It sounds small, but a week that starts on the wrong day is the thing people notice every single morning.
Step 2: Pick the pages you’ll really use
This is where most planners go wrong. It’s tempting to include everything, and then half the pages stay empty and make the rest harder to find. A dated planner is usually built from five kinds of pages:
- A year calendar and index, so you can see the whole year and jump anywhere from one page.
- Quarterly goal pages, for the few things you want done every three months.
- Monthly calendars, for deadlines, birthdays and anything you plan ahead.
- Weekly pages, for the week at a glance.
- Daily pages, for the day itself.
A good rule is to keep the pages you’d open at least once a week and drop the rest. If you only plan by the week, turn daily pages off and your planner gets much shorter and quicker to move around.
If you do keep daily pages, the layout matters more than anything else in the planner, because you’ll see it every day. Pick the one that matches how your days actually go: an hourly schedule if your day is full of appointments, a to-do list if it’s mostly tasks, a plain dot grid if you like to freewrite, or a Focus page that asks for one big thing, three smaller tasks and your time blocks.
Step 3: Add your holidays and calendar events
A planner feels a lot more useful when the dates you already know are printed in it. Public holidays are the easy part. Your own events take one extra step: most calendar apps give you a private link to your calendar, and a builder can read that link once and print your events on the right month, week and day pages.
In Google Calendar, that link is the secret address in iCal format, and Google’s help page on syncing your calendar with other programs shows where to find it. Outlook and iCloud have the same kind of link. Keep it private, since anyone with it can read your calendar.
One thing to know: a PDF is a snapshot. Events you add to your calendar later won’t show up in the planner by themselves, so this works best for things you already know, like trips, school breaks and recurring meetings.
Step 4: Give your notes a home
Notes are what turn a calendar into a planner you actually live in. Instead of writing meeting notes in the margins of a week, add a few note sections at the back, each with its own name, page style and index. Meeting notes, a monthly budget, a reading log or a plain dot grid for ideas are all good candidates.
Keep it to a handful. Three or four sections you use are worth more than ten you forget about, and every section adds pages to scroll past. If notes are the main thing you need, a separate notebook might suit you better, and we cover that in how to make a custom notebook for your e-ink tablet.
Step 5: Make it fit your tablet
Last comes the part that’s easy to forget: making the file fit your device. The page size should match your exact tablet, not just the brand, since a Supernote Nomad and a Supernote Manta are very different sizes. Then pick the side your toolbar sits on, so the planner keeps a margin there and runs edge to edge everywhere else.
Add a cover with your name or the year on it and you have a planner that’s clearly yours, which makes it a lot easier to spot in a long list of files.
How to design your own planner in the mildspring builder
Our custom planner builder follows the steps above in order. You pick your tablet and toolbar side, then the year or undated, the start month and the first day of the week, the pages and daily layout, your holidays and calendar links, up to four note sections and a cover. The preview on the right shows your real pages as you go, so you see exactly what you’ll get before you pay.
- It works with reMarkable, Kindle Scribe, Supernote, BOOX, Kobo, Fujitsu Quaderno and iPad, plus two general sizes for other tablets.
- A planner is $19 for one tablet, and $5 for each extra tablet if you want the same planner on more than one device.
- We build the PDF as soon as your payment clears, and it’s usually ready within a few minutes.
- If your plans change, the link in your download email lets you change and rebuild your planner up to ten times.
Putting your planner on your tablet
Once you have the PDF, load it the way your tablet takes files: its desktop or phone app, its cloud sync, or a USB cable. Open it once and tap a few links to make sure they jump where you expect. If you’re on a reMarkable, our guide on how to use a hyperlinked PDF planner on reMarkable covers the gestures and settings that make it feel quick.
Ready to make one that fits the way you plan? Build your custom planner, see every page before you pay, and have it on your tablet in a few minutes.
